It looks like we may be having our second major snow storm of the new year, which may mean two consecutive weeks of multiple snow days. I really can't complain. I don't really mind all of the shoveling, and the set back of graduating a couple days later to make up for the lost days doesn't really bother me. I probably should be using the extra days off to get more studying done, May will be here before I know it, laughing at me as I sit in a room for 4 hours taking AP tests, while she's shining her sun and warming the earth. But instead of studying, what do I do? I take time to prepare food I wouldn't have time to make during the school day. I think up little snacks that I would love to have. (Like the one I thought of today during Philosophy class: chocolate cashew butter. It would be sooo easy. And so good.) Sundays are also spent making foods for me to eat during the week. Dips and pates are the easiest, because I love munching on veggies during the day and salads aren't very ideal to be taken out in the middle of class. Some celery, or peppers, with a nice nut or bean dip, and no one even notices.
I've been experimenting with nut "cheeses" a bit lately, trying to ferment them to get that tangy cheese taste. The fermenting hasn't been too successful. I'm going to try adding more miso, and if that doesn't work then just breaking open a probiotic and adding that. So the cheese I made is not notably tangy, but it is still very good. The consistency is very smooth, and the olive oil-rosemary combination gives it a creamy herby flavor.
If you left this out for say, a couple days, it may legitimately ferment, but to be honest I wanted some good dip, and I didn't feel like waiting.
Herbed Raw Cashew "Cheese"
2 cups raw cashews
1 cup raw walnuts
1 tbls extra virgin olive oil
3/4 tsp thyme
1 tsp rosemary
1/4 tsp garlic powder
1 tsp salt
1 tsp miso paste
1.) Soak cashews and walnuts for at least 2 hours, or over night.
2.) Drain nuts. Puree them in your food processor until crumbly.
3.) Add the rest of the ingredients and blend until the mixture is very smooth, like a creamy nut butter.
4.) Put a cheesecloth over a small bowl, and then put the cheese mixture on top of the cheesecloth. Then put plastic wrap over the cheese mixture to keep it from drying out. I used a rubber band to hold the cheese cloth onto the bowl like a cover. The weight from the nut cheese will sink it down a bit.
5.) Let the "cheese" sit like this for 24 hours (or more) in a warm place.
6.) Put the cheese on a plate and enjoy with veggies, chips, crackers, in sandwiches, or whatever else suits you.
On cheesecloth, covered with plastic wrap.
Being enjoyed with Mom's homemade brown rice crackers.
I love local, seasonal, and wholesome food. I also love to share my cooking experiences with people.
So stop by, relax, and take a moment to smell the baking bread.
January 31, 2011
January 24, 2011
Rawish Chocolate. Kind of.
Most teenagers go to the mall and go on shopping sprees. I go shopping at work (a natural foods store) and to the occasional Whole Foods, where I generally buy things that I don't need with money that I shouldn't be spending. For example, the excessive amount of chapsticks that I bought on my most recent visit. Hey, it's the winter, okay? We all need a little bit extra chapstick. I also had to buy the burdock root I found, even though I have no idea how to consume it. Do I make tea? Would I have to dry it first? Can I just pan fry it and eat it? Who knows. I'll find out eventually, I promise. Maybe I'll post it. A few other first time purchases were cacao beans and maca powder. You can never get enough super foods. And while I don't have any cocoa butter, I do have a 3.5 lb tub of coconut oil, which I can probably sub in while I experiment with a rawish cacao bar, which I don't think I can accurately call chocolate because of the lack of cocoa butter. It doesn't taste like the Green & Blacks chocolate I buy when I have a craving, but then again it is primarily raw, so I wouldn't expect it to. It was my first try, but I would definately make this again. And it would be a great base if I wanted to add anything extra. Cacao bar with goji berries, anyone? This is what I think about instead of paying attention in calc class.
Cacao Bars
makes 16 little squares
1/2 cup raw cashews
3/4 cup ground cacao beans
3 tbls maca powder
3 tbls raw honey
2 tbls coconut oil
1 tbls cocoa powder
1.) Grind cacao beans in a coffee grinder so that you have 3/4 cup of powder (you could of course just use raw cacao powder, but why be simple?)
2.) Put all of the ingredients in a food processor and mix until the cashews are just little specks of white.
3.) Taste. Add more honey, oil or cacao if desired.
4.) Put mixture into pan and press down until the mass is very thin, like a chocolate bar. I would recommend using a smaller pan so that the edges of the pan shape the sides of the mass and you don't just have a giant blob. Unless you want a giant blob.
5.) Put in freezer for about 15 minutes, then take out and cut into 16 squares. Store in fridge and enjoy!
Chocolate Coffee Protein Bars
But, where do you get your protein? The universal question of non-vegans/vegetarians. I get plenty of protein from nuts, seeds, grains, veggies, of course. But I've been experimenting with hemp protein powder lately, and while I wouldn't consider it a "whole food" it seems to be much less processed than the regular isolated proteins, *cough* soy.
So here's a take on some awesome bars that I've tried at work, but can't afford to be spending my money on all of the time!
Chocolate Coffee Protein Bars
makes 12 bars
1 cup almond butter
1/2 cup of raw honey and agave, in any ratio you'd like
1 cup hemp protein powder (I used Bob's Red Mill)
1/4 cup unsweetened chocolate
1/3 cup cocoa powder
1/4 cup VERY strong coffee
1.) Put all of the ingredients in the food processor and mix well.
2.) Flatten mixture into a pan for desired thickness.
3.) Chill in fridge for about 20 minutes, and then cut into bars.
4.) Store in fridge.
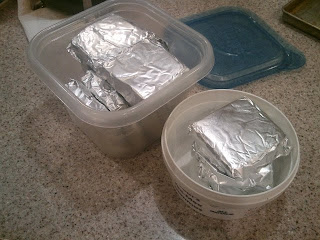
I like to wrap mine individually in foil so that I can just grab them for a snack at school.
These are uber tasty, but very rich and satisfying. Enjoy!
Pre-Packaging
Individually wrapped!
January 14, 2011
Pumpkin Butter!
A friend's mom gave me a little jar of pumpkin butter, which was awesome. I reinvented the "butter and jelly on toast" combination with toasted Ezekiel bread, coconut butter, and pumpkin butter.
However the jar being little, it didn't last too long. The ingredients were pumpkin, sugar, and citric/ascorbic acid. I made it with agave and a little bit of maple syrup, which rounds out the simple sweet flavor. I would recommend using canned pumpkin for this recipe as opposed to home-baked pumpkin, because the canned pumpkin is so finely pureed. The batch that I made is definitely not as sweet as the store bought jar, but that's fine for my preference.
Homemade Pumpkin Butter
1 1/2 cups pureed pumpkin
6 tbls agave
2 tbls maple syrup
Whisk together, and enjoy. The desired sweetness level is of course, up to you. If you have a sweet tooth you may want to add more agave. If you don't, you may want to cut back, say to 4 tbls agave.
January 7, 2011
Kale Chips
Ah, fresh veggies. Ripe, in-season fruit. Long, warm days- Oh wait, it's winter. Everything is cold and dead. And the worst is yet to come. I'm a very optimistic person, can't you tell? Despite the cold, i'm still trying to get in the fruits and veggies that make me feel so good. Room temperature smoothies have been keeping me going through the school day, but these conspicuous green concoctions in translucent red nalgene bottles aren't quite enough. I like solid food sometimes too, you know?
January 1, 2011
Happy New Years Day!
Last night I made these gluten-free chocolate chip cookies from Gluten-Free Goddess, without the expresso. (It was 9 o'clock and I didn't feel like making a bit of coffee.) They were pretty awesome. I've made a fair amount of gluten free muffins/other various gluten free baked goods, but I am nowhere near getting the art down to a science. They weren't crazy sweet, and I liked them, so then I got my brother to try them, who also liked them, so I figured they were good enough to bring to my boyfriend's house. (His little sister has celiac disease.) When I was gone my brother fed some to his friends (who didn't know they were vegan or gluten free) and they thought they were really good. Woo hoo! Passing the ultimate test. So, if you were at all wondering about a good gluten free chocolate chip cookie recipe, hit up Karina's site. Actually pretty much everything I've made from her blog has been awesome, so you can't really go wrong.
Happy New Year!
Happy New Year!
Subscribe to:
Posts (Atom)